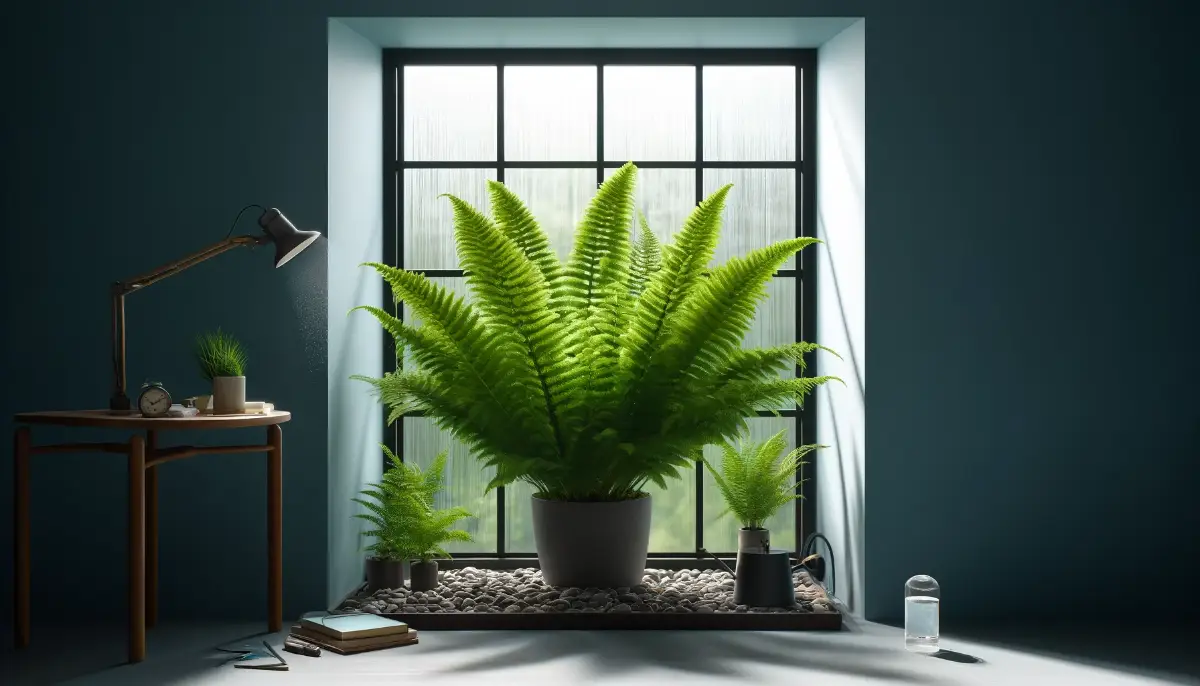
The Boston Fern, scientifically known as Nephrolepis exaltata, is a lush and archetypal fern widely cherished for both indoor and outdoor cultivation.
With its voluminous, verdant fronds that gracefully arch and cascade, this fern not only adds a touch of greenery but also a bit of air-purifying qualities to any space.
Originating from tropical and subtropical regions, its adaptability allows it to thrive in various environments, provided it receives the right care.
Boston Ferns are particularly appreciated for their relatively easy maintenance plants and their ability to bring a sense of calm, natural beauty to homes, offices, or shaded garden spots.
Optimal Growing Conditions
Lighting Requirements
Boston Ferns require specific lighting conditions to thrive, particularly thriving under indirect, filtered sunlight. Direct sunlight can be too harsh, leading to scorched and browned fronds.
Ideally, these ferns should be placed in a location where they can receive bright, but not direct, sunlight. An east-facing window that offers morning sun is mild and suitable, or a north-facing window which provides steady, filtered light all day.
If the only available light source is stronger, like from a south or west facing window, it’s beneficial to diffuse the light using a sheer curtain to protect the plant from the intense midday sun.
Temperature and Humidity Needs
Boston Ferns thrive in warm and humid conditions, reflecting their tropical origin. Ideal temperature ranges for these ferns are between 16°C – 27 °C. They can tolerate a wider temperature span from 10 °C – 35°C , but extremes should be avoided to prevent stress and damage to the plant.
Humidity is crucial for the Boston Fern, ideally requiring a high humidity environment to mimic their natural rainforest habitat. Indoor air, especially in heated or air-conditioned spaces, often becomes too dry for these ferns, leading to dried fronds and reduced vigor.
To increase humidity around the plant, methods such as placing it on a tray filled with pebbles and water, using a room humidifier, or situating the plant in naturally humid areas like kitchens or bathrooms can be beneficial. Regular misting of the ferns is also recommended, particularly in dryer climates or during winter months when indoor heating can reduce air moisture significantly.
Watering Techniques
Watering your Boston Fern correctly is key to its growth and health, as these plants prefer a consistently moist soil environment. The soil should be kept lightly moist but never soggy.
Think of the ideal moisture level as similar to a wrung-out sponge, which is damp but not dripping water. This balance prevents the roots from becoming waterlogged and developing root rot, a common issue in overly wet soils.
For indoor plants, watering should be adjusted based on the dryness of the top layer of the soil. Generally, watering once the top inch of soil feels dry to the touch is a good rule.
During warmer or drier seasons, the frequency of watering may increase, and during the winter, it should be reduced as the plant’s growth slows down. Using lukewarm water is advisable as cold water can shock the roots, potentially causing stress to the plant.
In terms of technique, watering at the soil level is crucial to keep the fronds dry and healthy. Avoid letting water sit on the fronds as this can lead to issues with disease and pest infestation.
If your fern is placed in conditions with lower humidity than it prefers, consider using a humidity tray or a mister to help maintain the appropriate moisture level around the plant.
Fertilizing Schedule
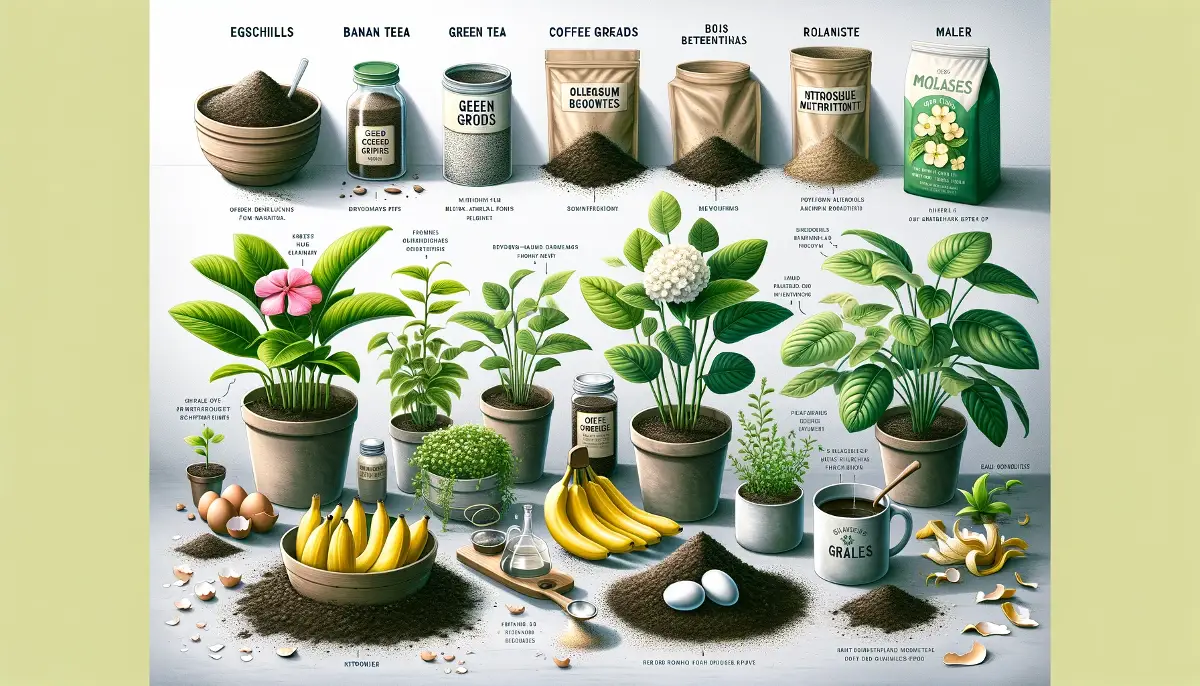
Maintaining a healthy Boston Fern involves an organic fertilizing schedule tailored to support its growth without overwhelming it with chemicals. Here’s how to nourish your fern organically:
- Spring to Early Fall Feeding: Start your fertilizing routine in early spring and continue through to early fall. During this period, feed your Boston Fern every two weeks with an organic liquid fertilizer. A dilution of fish emulsion or seaweed extract is excellent for ferns, providing a gentle dose of nutrients that supports lush growth.
- Dilution Is Key: Whatever organic fertilizer you choose, it’s essential to dilute it to half the recommended strength. Boston Ferns are sensitive to over-fertilization, which can lead to burned fronds and stunted growth. By using a weaker solution, you ensure the plant receives enough nutrition without the risk of chemical burn.
- Winter Care: Reduce or completely stop fertilizing in winter. During this time, the plant’s growth slows down significantly due to lower light levels and cooler temperatures, and it requires fewer nutrients. Over-fertilizing during dormancy can harm the plant’s health.
- Organic Alternatives: For a great organic boost, you can occasionally use Epsom salts mixed with water (about 1 tablespoon per gallon). This provides magnesium, which is crucial for plant health and can enhance leaf greenery. Apply this solution once a month in place of your regular fertilizing during the growing season to promote vibrant fronds.
By following this organic fertilizing schedule, your Boston Fern will receive all the nutrients it needs to thrive in a natural and gentle manner.
Read also: How to Water Organic Indoor Plants
Soil and Repotting
The right soil and proper repotting techniques are crucial for the health of your Boston Fern. Here’s a guide to ensure your fern thrives:
Soil Composition
Boston Ferns prefer a light, well-draining potting mix that can retain some moisture without becoming waterlogged. A mix of one part peat moss or coco coir with one part perlite or vermiculite is ideal.
This composition ensures adequate drainage and aeration, preventing root rot while keeping the roots moist.
Repotting Frequency and Process
- Frequency: Boston Ferns typically need to be repotted every 2-3 years, or when you notice that the plant has outgrown its pot. Signs of this include roots growing through the drainage holes or circling the surface of the soil.
- Best Time to Repot: Early spring is the best time for repotting, as the plant is entering a period of active growth which will help it recover from the stress of repotting.
Steps for Repotting:
- Preparation: Before repotting, water your fern well to ensure the soil is moist, which will help protect the roots during the process.
- Choosing the Right Pot: Select a new pot that is 1-2 inches larger in diameter than the current pot. Ensure it has good drainage holes.
- Potting Mix: Prepare your potting mix as described above.
- Transferring the Plant: Gently remove the fern from its current pot, shake off excess old soil, and prune any dead or excessively long roots.
- Potting: Place some fresh potting mix at the bottom of the new pot. Position the fern in the center and fill around the roots with more mix. Gently tamp down the soil to remove air pockets and water thoroughly.
Aftercare
Post-repotting care involves placing the fern in an appropriate location where it can receive indirect light and ensuring the soil remains moist but not soggy. Monitor the fern for signs of stress and adjust care as necessary.
Proper soil choice and careful repotting help maintain the vitality and aesthetic appeal of your Boston Fern, ensuring it continues to beautify your space for years to come.

Pruning Techniques
Routine Maintenance: Regularly inspect your Boston Fern and remove any dead or dying fronds. This helps the plant direct its energy towards growing healthy, vibrant fronds. Use clean, sharp scissors or pruning shears to make clean cuts, which help prevent infection.
Seasonal Pruning: Conduct a more thorough pruning in the spring or early summer, which can invigorate your fern and encourage fuller growth. During this pruning, you can cut back any fronds that are too long or disrupt the plant’s shape. Aim to maintain a balanced, attractive form that enhances your space aesthetically.
Maintenance Tips
Cleaning the Fronds: Dust can accumulate on the fronds, blocking sunlight and reducing the plant’s ability to photosynthesize. Gently wipe the fronds with a damp cloth or use a soft brush to remove dust. This not only keeps the plant looking fresh but also supports its health and growth.
Monitoring for Pests and Diseases: Keep an eye out for signs of pests or diseases, such as spotting on the fronds or webbing, which could indicate spider mites or fungal infections. Early detection is key to managing these issues effectively.
If you notice pests, you can use a mild insecticidal soap or neem oil spray to treat the plant, always following the product instructions carefully.
Environmental Conditions: Ensure that your Boston Fern is in an environment that mimics its natural humid, shady habitat. Avoid placing it in direct sunlight or in drafty areas, as extreme conditions can stress the plant, making it more susceptible to issues.
Regular pruning and diligent maintenance will help your Boston Fern thrive, adding a lush, green presence to your indoor or outdoor garden. These practices not only improve the plant’s appearance and health but also enhance its longevity and vitality.
Propagation Methods
Propagating Boston Ferns is a practical way to expand your collection or share plants with friends. Here are the most common methods for propagating these lush ferns:
Division
Division is the simplest and most effective method for propagating Boston Ferns. This method involves splitting the plant into smaller, individual plants, each with its own root system. Here’s how to do it:
Choose the Right Time: Spring or early summer is the best time to divide ferns, as the plant is entering its active growing phase.
Remove the Plant: Carefully take the fern out of its pot and gently shake off excess soil to expose the roots.
Divide the Root Ball: Using your hands or a clean, sharp knife, split the root ball into sections. Make sure each section has a good amount of roots and fronds.
Repot: Plant each division in its own pot filled with appropriate potting mix, as discussed in the soil and repotting section. Water well and place it in a suitable location.
Spores
Propagating Boston Ferns from spores is more challenging but can be rewarding. Ferns produce spores on the undersides of their fronds in tiny structures called sori. Here’s a general guide to this method:
Collecting Spores: Wait until the spores under the fronds turn brown, which indicates they are mature. Carefully cut a frond and place it spore-side down on a piece of paper. After a few days, the spores will fall onto the paper.
Sowing Spores: Prepare a container with a moist, sterile growing medium such as peat or a peat-perlite mix. Sprinkle the spores over the surface. Cover the container with plastic wrap to maintain high humidity.
Germination: Place the container in a warm, bright area but out of direct sunlight. The spores can take several weeks to months to germinate. Keep the soil moist but not wet.
Growing On: Once the spores develop into small ferns, continue to grow them in a humid, indirect light until they are large enough to handle and pot up individually.
Both methods have their own benefits and can be quite successful with a bit of care and attention. Division is quicker and generally more reliable, while growing from spores offers a deeper dive into the life cycle of ferns and can be especially rewarding for those interested in botany or plant science.
Troubleshooting Common Issues
Caring for Boston Ferns can sometimes present challenges, but understanding common issues and knowing how to address them can help keep your plant healthy and vibrant. Here are some troubleshooting tips for common problems encountered with Boston Ferns:
Brown and Crispy Fronds
- Cause: Low humidity or under-watering are common causes of brown, crispy fronds. Boston Ferns thrive in high humidity environments.
- Solution: Increase humidity around the plant by placing it on a humidity tray filled with water and pebbles, or by using a room humidifier. Also, ensure the soil is consistently moist but not waterlogged.
Yellowing Fronds
- Cause: Over-watering or poor drainage can lead to yellow fronds, which may also be a sign of a nutrient deficiency.
- Solution: Check the pot’s drainage and adjust your watering schedule. Ensure the potting mix is not too dense and consider repotting if drainage is poor. Additionally, a light application of a balanced, diluted fertilizer can help address nutrient deficiencies.
Sparse or Leggy Growth
- Cause: Inadequate light often leads to sparse, leggy growth as the fern stretches towards the light source.
- Solution: Move the fern to a location where it receives bright, indirect light. If the plant is already in a bright area, rotate it regularly to ensure even light exposure, which promotes denser growth.
Pests
- Common Pests: Boston Ferns may occasionally be affected by pests such as spider mites, mealybugs, or scale insects.
- Solution: Regularly inspect the fronds, especially the undersides, for signs of pests. Treat infestations early with insecticidal soap or neem oil, applying as directed. Keeping the fronds clean and dust-free can also help prevent pest issues.
Drooping or Wilting Fronds
- Cause: This can be caused by both over and under-watering, extreme temperatures, or sudden changes in the environment.
- Solution: Ensure the soil is moist and check for proper drainage. Avoid placing your fern near heat sources or in drafty areas. Adjust watering according to the season and indoor heating or cooling, which can affect indoor humidity levels.
By addressing these common issues promptly and adjusting care practices accordingly, you can help ensure your Boston Fern remains a lush and healthy addition to your indoor or outdoor plant collection.

FAQs about caring for Boston Ferns
How often should I water my Boston Fern?
Water your Boston Fern when the top inch of soil feels dry. Ensure the soil remains lightly moist but not soggy to touch.
What type of light is best for a Boston Fern?
Boston Ferns thrive in bright, indirect sunlight. Avoid direct sun exposure, which can scorch the fronds.
What is the ideal humidity level for Boston Ferns?
These ferns prefer high humidity levels. Aim for 50-70% humidity, which can be achieved with a humidity tray or a room humidifier.
When and how should I fertilize my Boston Fern?
Fertilize every two weeks during the growing season (spring to early fall) with a half-strength balanced liquid fertilizer. Reduce feeding in the winter months.
How do I repot a Boston Fern?
Repot your Boston Fern every 2-3 years in spring. Use a pot that is slightly larger than the current one and a well-draining potting mix.
Can Boston Ferns be grown outdoors?
Yes, they can be grown outdoors in temperate climates, placed in shaded areas where they won’t receive direct sunlight.
How do I increase humidity for my Boston Fern?
Besides using a humidifier, you can place the plant on a tray filled with pebbles and water, ensuring the pot is not sitting directly in the water.
What are the signs of overwatering a Boston Fern?
Signs include yellowing fronds and a soggy, waterlogged soil. Reduce watering and ensure good drainage to help prevent root rot.
How do I prune my Boston Fern?
Prune by removing any dead or dying fronds at the base of the plant to encourage healthy growth and improve air circulation around the plant.
Can I propagate my Boston Fern from cuttings?
Boston Ferns are typically propagated by division, not cuttings. You can divide the plant during repotting by separating the root ball into smaller sections, each with some fronds and roots attached.