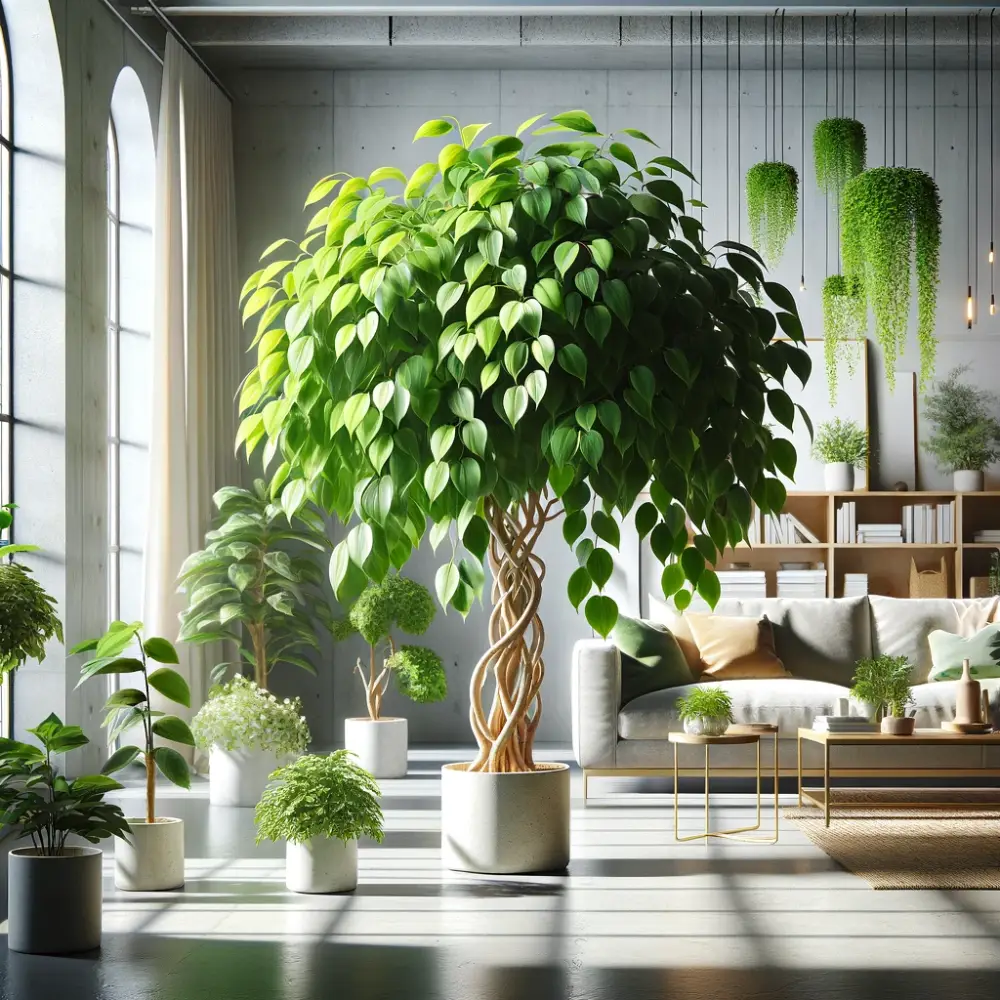
The Dwarf Umbrella Tree, scientifically known as Schefflera Arboricola, is a popular houseplant recognized for its attractive, glossy, green foliage and easy-care nature. Native to Taiwan and Hainan, this tropical plant is beloved by indoor gardeners for its versatility and adaptability to indoor environments.
One of the key benefits of having a Dwarf Umbrella Tree indoors is its ability to purify the air. It helps remove toxins such as benzene, formaldehyde, and toluene, contributing to a healthier indoor atmosphere. Additionally, its lush, vibrant appearance adds a touch of natural beauty to any room, making it an excellent choice for home decor.
The Dwarf Umbrella Tree is also known for its resilience and ability to thrive in various conditions, which makes it an ideal plant for both novice and experienced gardeners. With proper care, this plant can grow up to 4-8 feet tall indoors, creating a striking focal point in your living space.
[zynith-toc]
Ideal Growing Conditions
Creating the right environment is essential for the healthy growth of a Dwarf Umbrella Tree (Schefflera arboricola) indoors. Here are the key factors to consider:
Light Requirements
- Preferred Light Conditions: Dwarf Umbrella Trees thrive in bright, indirect light. Place the plant near a window that receives plenty of light, but avoid direct sunlight, which can scorch the leaves. An east or north-facing window is often ideal.
- Tolerance to Lower Light Conditions: While these plants can tolerate lower light conditions, they may grow more slowly and become leggy. If light is insufficient, consider using a grow light to supplement natural light.
Temperature and Humidity
- Ideal Temperature Range: Dwarf Umbrella Trees prefer a consistent temperature between 65-75°F (18-24°C). Avoid placing the plant near drafts, air conditioners, or heaters, as sudden temperature changes can stress the plant.
- Humidity: These plants thrive in moderate to high humidity. Aim for a humidity level of around 60-70%. Increase humidity by misting the leaves regularly, using a humidifier, or placing a tray of water near the plant.
Soil Requirements
- Best Soil Type: Use a well-draining potting mix, such as a peat-based mix with added perlite or sand to improve drainage. A mix designed for tropical houseplants is often suitable.
- Importance of Soil pH: The ideal soil pH for Dwarf Umbrella Trees is slightly acidic to neutral, around 6.0-7.0. This range ensures optimal nutrient availability.
Potting and Repotting
- Choosing the Right Pot: Select a pot with drainage holes to prevent water from accumulating at the bottom, which can lead to root rot. A pot that is 1-2 inches larger in diameter than the current one provides ample space for growth.
- How to Pot the Dwarf Umbrella Tree: Fill the pot with a layer of the chosen potting mix, place the plant in the center, and fill around the roots with more soil, pressing down gently. Water thoroughly after potting to settle the soil around the roots.
- Signs that Repotting is Needed: Repot every 2-3 years or when the plant becomes root-bound, indicated by roots growing out of the drainage holes or the soil drying out rapidly. Repotting allows for fresh soil and more room for growth.
Consider the space you have available and choose a plant size that fits your indoor environment. Dwarf Umbrella Trees can vary in size from small tabletop varieties to larger floor plants. A medium-sized plant is often a good choice for beginners as it is easier to manage and acclimate to new surroundings.
Younger plants are generally more adaptable to new environments, whereas older plants may take longer to adjust to changes.
Potting and Repotting
Proper potting and repotting practices are essential for the healthy growth of a Dwarf Umbrella Tree (Schefflera arboricola).
Choosing the Right Pot
- Importance of Drainage Holes: Select a pot with drainage holes to ensure excess water can escape, preventing root rot and other water-related issues.
- Size of the Pot: Choose a pot that is 1-2 inches larger in diameter than the current pot. This allows room for growth without overwhelming the plant with too much soil, which can retain excess moisture.
Materials Needed:
- Well-draining potting mix (peat-based mix with perlite or sand)
- Suitable pot with drainage holes
- Watering can
Steps to Pot the Plant:
Prepare the Pot: Place a layer of the potting mix at the bottom of the pot.
Remove the Plant from Its Current Pot: Gently loosen the plant from its current pot. You can lightly tap the sides or squeeze the pot if it’s plastic to help release the roots.
Inspect the Roots: Check for any damaged or rotting roots and trim them with sterilized scissors or pruning shears.
Position the Plant: Place the Dwarf Umbrella Tree in the center of the new pot.
Add Soil: Fill around the roots with the potting mix, pressing down gently to remove air pockets. Ensure the plant is at the same depth as it was in its previous pot.
Water Thoroughly: Water the plant thoroughly until water drains out of the bottom. This helps to settle the soil around the roots.
Signs that Repotting is Needed
- Frequency of Repotting: Repotting is generally needed every 2-3 years, depending on the growth rate of the plant.
Indications for Repotting:
- Root-Bound Condition: Roots growing out of the drainage holes or circling the surface of the soil.
- Soil Drying Quickly: The soil dries out rapidly after watering, indicating that the plant has outgrown its pot.
- Stunted Growth: The plant shows signs of slowed growth despite proper care.
- Toppling Over: The plant becomes top-heavy and is at risk of tipping over.
Steps for Repotting
Materials Needed:
- Larger pot with drainage holes
- Fresh potting mix
- Pruning shears or scissors
- Watering can
Steps to Repot the Plant:
Prepare the New Pot: Fill the new pot with a layer of fresh potting mix.
Remove the Plant: Carefully remove the plant from its current pot. If the plant is root-bound, you may need to gently tease the roots apart or trim them slightly.
Trim and Inspect Roots: Trim any damaged or excessively long roots. This encourages new growth and prevents root rot.
Position the Plant in the New Pot: Place the plant in the center of the new pot, making sure it is upright and at the same soil depth as before.
Add Soil: Fill in around the roots with fresh potting mix, pressing down gently to eliminate air pockets.
Water Thoroughly: Water the plant thoroughly to help settle the soil and eliminate air pockets.
Post-Repotting Care: Place the plant in its usual spot and avoid direct sunlight for a few days to help it acclimate to its new pot.
Watering and Fertilizing with Organic Fertilizer
Proper watering and fertilizing practices are crucial for the healthy growth of a Dwarf Umbrella Tree (Schefflera arboricola).
Watering Frequency:
- General Guidelines: Water the Dwarf Umbrella Tree when the top inch of soil feels dry to the touch. This typically means watering once a week during the growing season (spring and summer) and less frequently in the dormant season (fall and winter).
- Environmental Factors: Adjust watering frequency based on the plant’s environment. Factors such as temperature, humidity, and light levels can affect how quickly the soil dries out.
Techniques for Proper Watering:
- Deep Watering: Water the plant thoroughly until water drains out of the bottom of the pot. This ensures that the roots receive adequate moisture.
- Avoid Overwatering: Ensure the soil dries out slightly between waterings to prevent root rot. Overwatering is a common issue and can lead to yellowing leaves and root rot.
Seasonal Watering Adjustments:
- Growing Season (Spring and Summer): Increase the frequency of watering as the plant is actively growing and requires more moisture.
- Dormant Season (Fall and Winter): Reduce watering frequency as the plant’s growth slows down and it needs less water.
Fertilizing with Organic Fertilizer
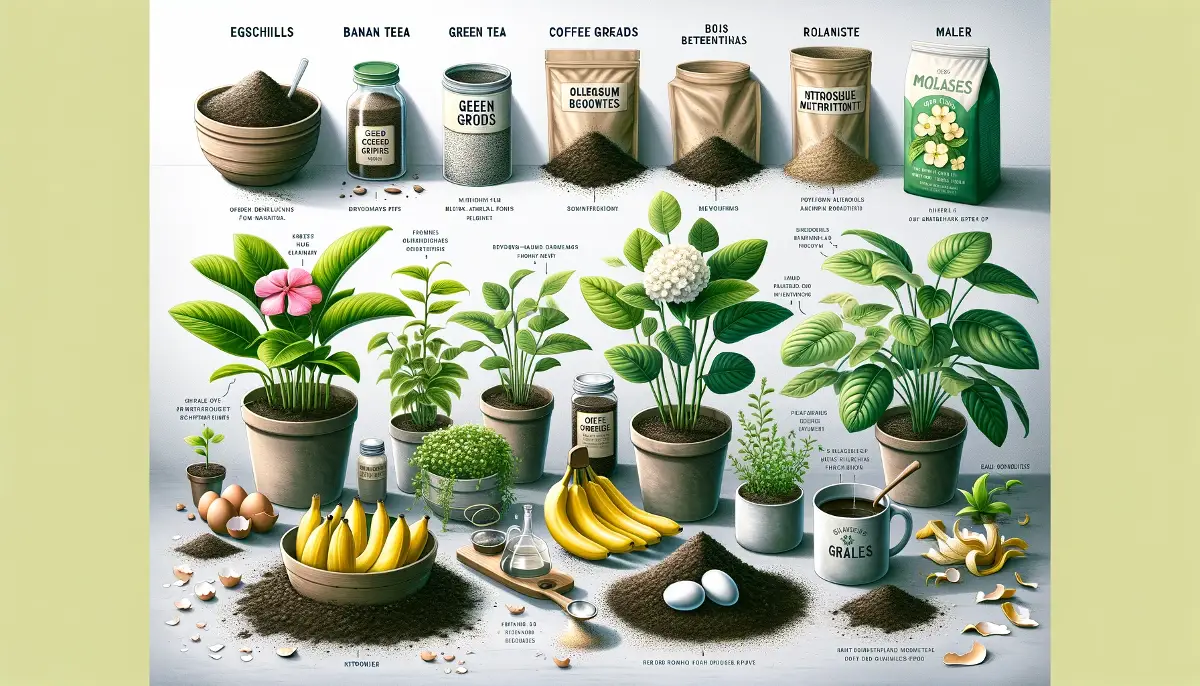
- Compost: Rich in essential nutrients, compost improves soil structure and provides a slow-release source of nutrients.
- Worm Castings: An excellent source of nutrients and beneficial microorganisms that promote healthy soil.
- Liquid Seaweed or Fish Emulsion: These liquid fertilizers provide a quick boost of nutrients and can be easily absorbed by the plant.
- Bone Meal or Blood Meal: These provide a good source of phosphorus and nitrogen, respectively, promoting healthy root and foliage growth.
Fertilizing Schedule:
- Growing Season (Spring and Summer): Apply organic fertilizer every 4-6 weeks. For liquid fertilizers, dilute according to package instructions and apply during regular watering.
- Dormant Season (Fall and Winter): Reduce or stop fertilizing as the plant’s growth slows down.
Application Tips:
- Top Dressing with Compost: Add a layer of compost to the top of the soil and lightly work it into the surface. Water the plant after applying compost to help nutrients penetrate the soil.
- Using Liquid Fertilizers: Mix liquid seaweed or fish emulsion with water according to the instructions and apply during watering. Ensure even distribution by watering the soil evenly around the plant.
- Incorporating Worm Castings: Mix worm castings into the top layer of soil or use them as a top dressing. They can also be steeped in water to create a nutrient-rich tea for watering.
Tips for Avoiding Over-Fertilization
- Follow Recommended Dosages: Always follow the recommended dosage on the fertilizer package to avoid over-fertilization, which can damage the plant’s roots.
- Monitor Plant Health: Watch for signs of over-fertilization, such as leaf burn, yellowing, or salt buildup on the soil surface. If these signs appear, reduce the frequency or concentration of fertilizer applications.
- Flush the Soil Periodically: Occasionally flush the soil with plain water to remove any accumulated salts and excess nutrients. This helps maintain a healthy balance of nutrients in the soil.
Pruning and Maintenance
Regular pruning and maintenance are essential for keeping your Dwarf Umbrella Tree (Schefflera arboricola) healthy and attractive. Prune the plant as needed to maintain its shape and health. This is usually done every few months or whenever you notice the plant becoming leggy or overgrown.
The best time to prune is during the growing season (spring and summer) when the plant is actively growing and can recover more quickly from pruning. Avoid heavy pruning during the dormant season (fall and winter), but light maintenance pruning can still be done if necessary.
Encouraging Bushier Growth
- Pinching: Pinch off the tips of new growth to encourage the plant to become bushier. This promotes the development of multiple branches.
- Cutting Back: Use sharp, sterilized pruning shears to cut back leggy or overly long stems. Make the cuts just above a leaf node (the point where a leaf attaches to the stem) to encourage new growth.
Removing Dead or Yellowing Leaves
- Regularly check for and remove any dead, damaged, or yellowing leaves. This helps the plant focus its energy on healthy growth and prevents potential pest and disease issues.
Shaping the Plant
- Prune to shape the plant as desired. Whether you want a compact, bushy plant or a more tree-like appearance, strategic pruning can help achieve your preferred look.
- Thinning: Thin out crowded branches to improve air circulation and light penetration, which can reduce the risk of disease.
Propagation
Propagating a Dwarf Umbrella Tree (Schefflera arboricola) can be a rewarding way to expand your plant collection or share with friends.
- Stem Cuttings: The most common and effective method for propagating Dwarf Umbrella Trees.
- Air Layering: An alternative method that can be used but is more complex and time-consuming.
Propagation Using Stem Cuttings
Materials Needed:
- Sharp, sterilized pruning shears or a knife
- Rooting hormone (optional but recommended)
- Small pots or propagation trays
- Well-draining potting mix or a mix of peat and perlite
- Plastic bag or propagation dome (for humidity)
- Watering can or spray bottle
Steps for Successful Propagation:
- Choose a healthy, mature stem that is at least 4-6 inches long and has several leaves. Avoid stems that are flowering.
- Using sterilized pruning shears or a knife, make a clean cut just below a leaf node (the point where a leaf attaches to the stem). This is where new roots will develop.
- Remove the lower leaves from the cutting, leaving 2-3 leaves at the top. This reduces water loss and encourages root growth.
- Optional: Dip the cut end of the stem in rooting hormone to increase the chances of successful rooting.
Plant the Cutting:
- Fill a small pot or propagation tray with a well-draining potting mix or a mix of peat and perlite.
- Make a hole in the soil with your finger or a pencil and insert the cutting, ensuring the cut end is buried about 1-2 inches deep.
- Firm the soil around the cutting to hold it in place.
Create a Humid Environment:
- Cover the pot with a plastic bag or place it under a propagation dome to maintain high humidity. This helps the cutting retain moisture and encourages rooting.
Watering and Care:
- Mist the cutting lightly with water to keep the soil moist but not soggy. Avoid overwatering, as this can cause the cutting to rot.
- Place the pot in a warm, bright location with indirect light. Avoid direct sunlight, which can stress the cutting.
Monitoring and Root Development:
- Check the cutting regularly for signs of new growth, which indicates that roots are developing. This can take several weeks.
- Once new leaves start to grow, gradually acclimate the cutting to normal humidity levels by removing the plastic bag or propagation dome for a few hours each day.
Propagation Using Air Layering (Alternative Method)
Materials Needed:
- Sharp, sterilized knife
- Rooting hormone (optional)
- Sphagnum moss
- Plastic wrap or aluminum foil
- Twine or twist ties
Steps for Air Layering:
- Choose a healthy, mature stem on the plant that is at least 12 inches long.
- Using a sterilized knife, make a 1-2 inch long cut around the stem, about one-third of the way through, just below a leaf node. Remove the bark from this section to expose the inner stem.
- Soak sphagnum moss in water and wrap it around the exposed area. Secure the moss with plastic wrap or aluminum foil, ensuring it stays moist.
Secure and Monitor:
- Tie the wrapping securely with twine or twist ties. Check the moss regularly to ensure it remains moist.
Root Development:
- Roots should begin to develop in a few weeks to a few months. Once a healthy root system has formed, cut the stem below the new roots and plant it in a pot with well-draining soil.
Post-Propagation Care
- Transplanting Cuttings: Once the cuttings or air-layered sections have developed strong roots, transplant them into individual pots with well-draining soil.
- Acclimating New Plants: Gradually introduce the new plants to their permanent location, ensuring they receive proper light, temperature, and humidity conditions.
Dealing with Pests and Diseases
Proper pest and disease management is crucial to maintaining the health and vitality of your Dwarf Umbrella Tree (Schefflera arboricola). Here’s how to identify, prevent, and treat common issues:
Spider Mites
Identification: Look for tiny, red or brown specks on the undersides of leaves, fine webbing, and stippled, yellowing leaves.
Treatment:
- Isolate the affected plant to prevent spreading.
- Spray with a strong jet of water to dislodge mites.
- Use insecticidal soap or neem oil, applying thoroughly to both sides of the leaves.
- Increase humidity around the plant, as spider mites thrive in dry conditions.
For more tips, check out this article: Organic Solutions for Spider Mites in Indoor Gardens
Mealybugs
Identification: Look for white, cotton-like masses on stems, leaf joints, and undersides of leaves.
Treatment:
- Dab affected areas with a cotton swab soaked in rubbing alcohol.
- Use insecticidal soap or neem oil, ensuring to cover all affected areas.
- Repeat treatments weekly until the infestation is under control.
For more tips, check out this article: Natural Methods to Control Mealybug Infestations
Aphids
Identification: Look for small, green, yellow, or black insects clustered on new growth and a sticky residue (honeydew) on leaves.
Treatment:
- Spray with a strong stream of water to dislodge aphids.
- Apply insecticidal soap or neem oil, covering all infested areas.
- Introduce beneficial insects like ladybugs, if feasible.
For more tips, check out this article: Non Toxic Aphid Control: Safe for Pets, Deadly for Pests
Root Rot
Identification: Look for wilting, yellowing leaves, and a foul smell from the soil. Roots will appear brown and mushy.
Treatment:
- Remove the plant from its pot and trim away affected roots.
- Repot in fresh, well-draining soil and a clean pot.
- Adjust watering practices to ensure soil dries out slightly between waterings.
For more tips, check out this article: Organic Tactics Against Indoor Root Rot
Leaf Spot
Identification: Look for brown or black spots on leaves, often with yellow halos.
Treatment:
- Remove and dispose of affected leaves to prevent spread.
- Improve air circulation around the plant by spacing it away from others.
- Apply an organic fungicide if the problem persists, following label instructions.
Powdery Mildew
Identification: Look for white, powdery substance on leaves and stems.
Treatment:
- Increase air circulation and reduce humidity around the plant.
- Spray with a mixture of water and baking soda (1 teaspoon per quart of water) or use a commercial fungicide.
- Avoid overhead watering to keep leaves dry.
For more tips, check out this article: Organic Solutions for Powdery Mildew: Safe and Effective Remedies
Troubleshooting Common Problems
Maintaining the health of your Dwarf Umbrella Tree (Schefflera arboricola) involves recognizing and addressing common problems that may arise. Here are some frequent issues and their solutions:
Yellowing Leaves
Possible Causes:
- Overwatering: One of the most common reasons for yellow leaves. Roots may become waterlogged, leading to poor oxygenation and root rot.
- Underwatering: Conversely, if the plant is too dry, it may also cause yellowing leaves.
- Nutrient Deficiency: Lack of essential nutrients, particularly nitrogen, can cause older leaves to turn yellow.
Solutions:
- Check Soil Moisture: Ensure you are allowing the top inch of soil to dry out between waterings. Adjust your watering schedule accordingly.
- Improve Drainage: Ensure the pot has adequate drainage and consider repotting if the soil is compacted or poorly draining.
- Fertilize Appropriately: Use a balanced, organic fertilizer during the growing season to provide necessary nutrients.
Dropping Leaves
Possible Causes:
- Environmental Stress: Sudden changes in temperature, light, or humidity can cause the plant to drop leaves.
- Improper Watering: Both overwatering and underwatering can lead to leaf drop.
- Pests: Infestations by pests such as spider mites or mealybugs can cause leaves to drop.
Solutions:
- Stabilize Environment: Maintain consistent temperature and humidity levels. Avoid placing the plant in drafty areas or near heating/cooling vents.
- Water Correctly: Follow proper watering practices, ensuring neither too much nor too little water.
- Inspect for Pests: Regularly check for pests and treat promptly if found.
Stunted Growth
Possible Causes:
- Nutrient Deficiency: Lack of essential nutrients can slow down the plant’s growth.
- Root Bound: If the plant has outgrown its pot, the roots may be cramped, limiting growth.
- Insufficient Light: Lack of adequate light can result in slow growth.
Solutions:
- Fertilize Regularly: Use a balanced, organic fertilizer to provide essential nutrients.
- Repot if Necessary: Check if the plant is root-bound and repot into a larger container if needed.
- Increase Light: Ensure the plant is receiving bright, indirect light. Supplement with grow lights if natural light is insufficient.
Brown Leaf Tips or Edges
Possible Causes:
- Low Humidity: Dry air can cause the tips of the leaves to turn brown.
- Water Quality: High levels of salts or chlorine in tap water can cause leaf burn.
- Over-fertilization: Excess fertilizer can lead to a buildup of salts, causing leaf tips to turn brown.
Solutions:
- Increase Humidity: Use a humidifier, mist the plant regularly, or place a tray of water nearby to increase humidity.
- Use Filtered Water: Water the plant with distilled or filtered water to avoid harmful chemicals.
- Fertilize Properly: Use fertilizer sparingly and follow recommended dosages. Flush the soil periodically to remove excess salts.
Wilting Leaves
Possible Causes:
- Underwatering: Lack of sufficient water can cause the leaves to wilt.
- Root Rot: Overwatering can lead to root rot, causing the plant to wilt despite moist soil.
- Heat Stress: Exposure to excessive heat can cause wilting.
Solutions:
- Adjust Watering: Ensure consistent and appropriate watering practices.
- Check for Root Rot: Inspect the roots for signs of rot and trim away any affected roots. Repot in fresh, well-draining soil if necessary.
- Regulate Temperature: Keep the plant in a moderate temperature range and avoid excessive heat.
Leggy Growth
Possible Causes:
- Insufficient Light: Lack of adequate light can cause the plant to stretch towards the light source, resulting in leggy growth.
Solutions:
- Increase Light Exposure: Place the plant in a brighter location with indirect sunlight. Supplement with grow lights if needed.
- Prune Regularly: Trim back leggy stems to encourage bushier growth.

FAQs about Dwarf Umbrella Tree (Schefflera arboricola)
How much light does a Dwarf Umbrella Tree need?
Dwarf Umbrella Trees thrive in bright, indirect light. They can tolerate lower light conditions, but may grow more slowly. Avoid direct sunlight, which can scorch the leaves.
How often should I water my Dwarf Umbrella Tree?
Water your Dwarf Umbrella Tree when the top inch of soil feels dry. This usually means watering once a week during the growing season and less frequently in the dormant season. Adjust based on the plant’s environment and moisture needs.
What type of soil is best for a Dwarf Umbrella Tree?
Use a well-draining potting mix, such as a peat-based mix with added perlite or sand. A mix designed for tropical houseplants is often suitable.
How do I know when it’s time to repot my Dwarf Umbrella Tree?
Repot your Dwarf Umbrella Tree every 2-3 years or when it becomes root-bound. Signs include roots growing out of the drainage holes, soil drying out quickly, or the plant becoming top-heavy and unstable.
What are the common pests that affect Dwarf Umbrella Trees?
Common pests include spider mites, mealybugs, and aphids. Regularly inspect your plant for these pests and treat infestations promptly with insecticidal soap, neem oil, or rubbing alcohol.
Why are the leaves of my Dwarf Umbrella Tree turning yellow?
Yellow leaves can be caused by overwatering, underwatering, or nutrient deficiencies. Check your watering practices and ensure the plant is receiving balanced nutrients.
How can I increase humidity for my Dwarf Umbrella Tree?
Increase humidity by misting the leaves regularly, using a humidifier, or placing a tray of water near the plant. Grouping plants together can also help raise humidity levels.
Can I propagate my Dwarf Umbrella Tree, and if so, how?
Yes, you can propagate your Dwarf Umbrella Tree using stem cuttings. Cut a healthy stem below a leaf node, remove the lower leaves, and plant it in a well-draining mix. Keep the cutting moist and in indirect light until roots develop.
How do I prune my Dwarf Umbrella Tree to keep it healthy and attractive?
Regularly prune to remove dead or yellowing leaves, and trim back leggy or overgrown stems to encourage bushier growth. Use sharp, sterilized pruning shears and make cuts just above a leaf node.
What should I do if my Dwarf Umbrella Tree is dropping leaves?
Leaf drop can be caused by environmental stress, improper watering, or pests. Ensure stable temperature and humidity levels, water correctly, and inspect for pests. Adjust care routines as needed to address the issue.