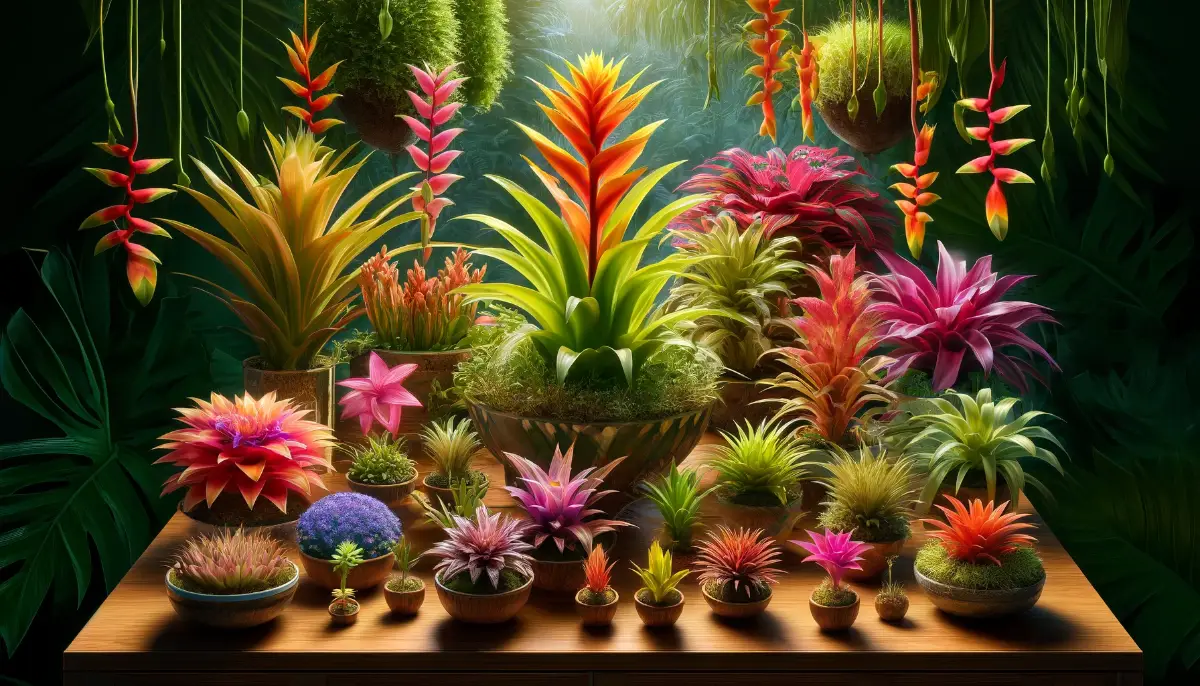
Bromeliads are a vibrant and diverse family of plants that bring a touch of the tropics to any indoor setting. Native to the tropical Americas, bromeliads boast a wide range of sizes, colors, and shapes, making them a fascinating addition to home décor.
Bromeliads are an excellent choice for anyone looking to add a low-maintenance yet exotic plant to their home. With their unique water-storing ability and striking appearance, they offer an ongoing spectacle of natural beauty and an engaging gardening project.
Adaptable and relatively easy to care for, bromeliads can thrive indoors with minimal maintenance. They typically enjoy bright, indirect light and require watering methods unique to their kind—water is often poured directly into the central “cup” formed by the leaves and occasionally into the soil.
This central tank acts not only as a reservoir but also as a habitat for small creatures in their native environment, such as frogs.
One of the most intriguing aspects of bromeliad care is their lifecycle. After flowering, the parent plant slowly dies, giving way to one or more “pups” — young plants that can be separated and grown as new individuals. This process allows bromeliad enthusiasts to expand their collection or share these delightful plants with friends and family.
Understanding Different Types of Bromeliads:
- Aechmea: Known for their stunning, durable flowers, Aechmeas are perfect for beginners. They thrive in bright, indirect light and require minimal watering.
- Guzmania: Guzmanias are popular for their vibrant, colorful bracts. They prefer more humid conditions and lower light, making them ideal for bathrooms or kitchens.
- Cryptanthus: Also known as Earth Stars due to their star-like appearance, these bromeliads do well in medium light and need slightly more frequent watering.
Essential Care
Light Requirements for Bromeliads
Proper lighting is crucial for the health and beauty of bromeliads. These tropical plants thrive under specific light conditions, depending on their type.
Bromeliads prefer bright, indirect light as their ideal lighting condition. This mimics the dappled sunlight of their natural rainforest habitat. Direct sunlight can scorch their leaves, so it’s best to provide filtered or diffused light.
Specific Requirements by Type:
Aechmea: These plants do well in low to medium light, making them suitable for less sunny spots in your home.
Guzmania: They require bright, indirect light but should be protected from direct sun. They’re perfect for east or north-facing windows.
Cryptanthus (Earth Star): They can tolerate lower light levels compared to other bromeliads, thriving in medium light which provides more flexibility in placement within indoor spaces.
Adjusting Light Based on Signs from the Plant:
If a bromeliad’s leaves become pale or bleached, it might be receiving too much light. Conversely, darker or elongated leaves can indicate insufficient light.
Rotating the plant occasionally ensures that all sides receive equal light, promoting even growth and preventing the plant from leaning towards the light source.
Using Artificial Lighting:
In situations where natural light is insufficient, fluorescent or LED grow lights can be effective. These lights should be placed a few feet away from the plants to simulate indirect light and should be on for about 12-14 hours per day to mimic natural daylight conditions.
Understanding and providing the right light conditions for your bromeliad will help ensure its vibrant color and healthy growth. Adjusting your care approach based on the type of bromeliad and the available light in your home is key to nurturing these stunning tropical plants effectively.
Temperature Preferences:
Bromeliads prefer a temperature range of 60-80°F (15-27°C). They are not cold-hardy and should be protected from temperatures below 50°F (10°C) as cold temperatures can cause damage to the plan.
During the warmer months, if indoor temperatures rise above this range, ensure good air circulation to help prevent overheating
Soil and Potting Needs for Bromeliads
Bromeliads have specific soil and potting requirements that support their health and growth. Proper potting helps ensure adequate drainage and aeration, which are crucial for these tropical plants. Here’s how to provide the best soil and potting conditions for bromeliads:
Soil Type:
Bromeliads require a well-draining, airy potting medium. A mixture similar to those used for orchids works well, often containing ingredients like pine bark, perlite, and coconut coir.
The soil should not retain too much moisture to prevent root rot. Adding sand or fine gravel can improve drainage and mimic the natural growing conditions of epiphytic bromeliads, which typically grow on other plants rather than in the ground.
Potting Mix Recipe:
A good basic mix for bromeliads could include equal parts of peat, perlite, and fine pine bark. This mix ensures good drainage while still holding enough moisture to support the plant’s needs.
Choosing the Right Pot:
The pot size should be appropriate for the size of the plant; bromeliads do not require large pots as their root systems are relatively small. Ensure the pot has good drainage holes.
Plastic pots are generally better than clay pots for bromeliads because they retain moisture longer and are lighter, making them easier to move if needed.
Repotting Tips:
Bromeliads generally only need to be repotted every few years or when they outgrow their current pot. It’s best to repot in the spring, which gives the plant time to establish in the warmer months before winter.
When repotting, be gentle with the roots and try to disturb them as little as possible. It’s also a good opportunity to separate any pups from the mother plant for propagation.
Providing the right soil and potting conditions is key to ensuring your bromeliad thrives. The correct mix and pot will facilitate proper water management and support the health of the plant, allowing it to grow and bloom spectacularly.
Watering Practices for Bromeliads
Watering bromeliads correctly is crucial for their health and longevity, as these plants have unique moisture needs compared to typical houseplants. Here’s a guide to the best watering practices for bromeliads:
Watering the Tank:
Many bromeliads have a central “tank” or “cup” formed by their leaves, which in their natural habitat collects water. In a home setting, it’s beneficial to mimic this by filling the central tank with water. This method allows the plant to absorb moisture as needed.
It’s important to keep the tank filled but clean. Change the water frequently to prevent stagnation and the growth of bacteria or mold.
Soil Moisture:
Although the central tank is important, the soil should not be neglected. Bromeliads should be watered in the soil as well, but the frequency depends on the potting mix and environmental conditions. Allow the top inch of the soil to dry out before watering again to ensure the roots do not sit in soggy soil.
Overwatering is a common mistake with bromeliads. Ensure the pot has good drainage to avoid excessive moisture that can lead to root rot.
Humidity and Misting:
Bromeliads thrive in humid environments, typical of their native tropical settings. If your home is dry, especially during winter months when heating systems are used, misting the plants regularly can help increase humidity around them.
Alternatively, placing a humidity tray near the plant or using a room humidifier can also maintain appropriate moisture levels.
Water Quality:
Use rainwater or distilled water if possible, as bromeliads can be sensitive to the chemicals and minerals found in tap water. These can accumulate in the central tank and potentially harm the plant.
By following these specific watering practices, you can ensure that your bromeliads receive the right amount of moisture without the risk of overwatering or underwatering, contributing to their overall health and vibrancy.
Advanced care for Bromeliads
Feeding and Fertilization of Bromeliads: Organic Practices
For those looking to grow bromeliads using organic practices, understanding the right approach to feeding and fertilization is key. Bromeliads are not heavy feeders, but they do benefit from light, regular feeding during their active growth periods.
Organic Fertilization Basics
Unlike other plants, bromeliads absorb nutrients mainly through their leaves rather than their roots. This makes foliar feeding an effective method for these plants.
An organic foliar spray can be made from seaweed extract or fish emulsion, diluted according to the product’s instructions. It’s important to apply this spray early in the morning or late in the afternoon to avoid burning the plant’s leaves with the sun’s intense midday rays.
Frequency of Feeding
During the growing season (spring and summer), you can apply an organic foliar feed once a month. In the cooler months, reduce feeding as the plant’s growth slows down.
Alternative Organic Nutrient Sources
Compost tea is another excellent option for providing nutrients to bromeliads. It offers a gentle, balanced nutrient mix that supports plant health without the risk of chemical burns that synthetic fertilizers can cause.
For those who prefer to avoid sprays, adding a thin layer of worm castings around the base of the plant can also provide a slow-release source of nutrients. This method is particularly gentle, making it hard to over-fertilize and harm the plant.
Considerations for Organic Care
Always ensure that any organic product used is free from pathogens and is suitable for use on indoor plants. Since bromeliads are sensitive to buildup on their leaves, it’s crucial to use clean, purified water when mixing solutions and to apply them in a way that minimizes residue on the foliage.
By adopting these organic feeding and fertilization practices, you can maintain healthy, vibrant bromeliads while adhering to sustainable gardening principles. This not only benefits your plants but also supports a healthier home environment.

Pruning and Maintenance of Bromeliads
Pruning and maintaining bromeliads are straightforward tasks that help keep these plants healthy and looking their best. Here’s how to effectively care for your bromeliads:
Pruning Dead or Dying Leaves
Regularly remove any dead or dying leaves from your bromeliad to prevent any potential rot and to keep the plant looking tidy. This can be done at any time of the year as needed.
Use clean, sharp scissors or pruning shears to make clean cuts, which help prevent damage to the remaining healthy parts of the plant.
Managing the Flower Spike
Once the bromeliad’s flower begins to die, it should be cut off to direct the plant’s energy towards the health of the remaining plant and the growth of new pups.
Prune the flower spike close to the base without harming the surrounding leaves to encourage the development of pups, which are new plants that will grow from the base of the existing plant.
Encouraging Pup Production
After the main plant flowers, it will eventually start to decline, but this is a natural part of the bromeliad’s lifecycle. During this time, the plant will typically produce several pups.
Allow the pups to grow until they are about one-third the size of the parent plant before gently separating them with a clean, sharp knife or letting them continue to grow to maturity while still attached to the parent.
Common Issues and Solutions for Bromeliads
Bromeliads are generally hardy, but like all plants, they can encounter some issues. Here’s a guide to common problems and how to solve them:
Brown Leaf Tips
Cause: Typically caused by dry air, under-watering, or a buildup of minerals from tap water.
Solution: Increase humidity around the plant, ensure consistent watering, and use rainwater or distilled water if possible to avoid mineral buildup.
Rotting Base or Crown Rot
Cause: Overwatering or water stagnation in the central tank can lead to fungal or bacterial infections.
Solution: Ensure the central tank is flushed out regularly with fresh water. Cut back on watering the soil and improve drainage. If rot is extensive, it may be too late to save the plant, but healthy pups can often be saved and repotted.
Pests (Scale, Mealybugs, Spider Mites)
Cause: These pests are attracted to bromeliads if the air is too dry or the plant is stressed.
Solution: Increase humidity and inspect plants regularly. Wipe off pests with a damp cloth or use an insecticidal soap or neem oil for more severe infestations. Be sure to apply treatments according to the product instructions to avoid damaging the plant.
Flower Bract Turning Brown or Fading
Cause: Normal part of the lifecycle; bromeliad flowers and bracts naturally die back after blooming.
Solution: No action is necessary other than to prune the dead flower to tidy up the plant and redirect energy to pups.
Leaf Spotting
Cause: Fungal infections often manifest as spots on the leaves, usually due to high humidity without adequate air circulation.
Solution: Improve air circulation around the plant, reduce ambient humidity slightly, and prune affected areas if necessary. Fungicidal sprays may be used as a last resort, following label directions.
By recognizing these common issues and implementing the solutions, you can maintain the health and beauty of your bromeliads, ensuring they remain a vibrant part of your indoor garden.

FAQs about Bromeliads:
How often should I water my bromeliad?
Water the central cup of the bromeliad every few days to keep it moist but not waterlogged. Allow the soil to dry slightly between waterings.
Do bromeliads need sunlight?
Bromeliads prefer bright, indirect sunlight. Direct sunlight can be too intense and may cause the leaves to scorch.
Can I grow bromeliads outdoors?
In warmer climates (USDA zones 10-11), bromeliads can be grown outdoors. They need protection from direct sunlight and extreme temperatures.
How do I propagate bromeliads?
Bromeliads can be propagated from pups, which are small plants that grow from the base of the mother plant. Once they are a third of the size of the parent, they can be separated and potted individually.
Why is my bromeliad turning brown?
Brown leaves can be caused by direct sunlight, low humidity, or water with high mineral content. Adjusting the environment and using distilled or rainwater can help .
What is the best soil for bromeliads?
Use a well-draining, airy potting mix, ideally formulated for orchids or bromeliads, which includes materials like pine bark and perlite.
How long do bromeliads live?
A bromeliad plant generally flowers once, lasting several months to a year before dying, but it will produce pups to continue its lifecycle.
Are bromeliads safe for pets?
Bromeliads are non-toxic and safe for cats and dogs. However, they can cause mild irritation to sensitive individuals if handled without care.
How can I increase humidity for my bromeliad?
Increase humidity by misting the plant regularly, using a humidity tray, or placing a humidifier nearby.
What should I do if my bromeliad’s flower dies?
Once the flower dies, it is normal for the parent plant to start declining. Prune the dead flower, focus on caring for the pups, and consider removing and repotting them when they are large enough.