Tillandsia, commonly known as air plants, belong to the Bromeliaceae family and are intriguing for their ability to grow without soil, absorbing moisture and nutrients through their leaves.
Their unique growing method, along with their diverse forms and sizes, makes them popular in home decor and among plant enthusiasts.
Unique Characteristics of Air Plants
- Soilless Growth: Unlike most plants, air plants don’t require soil to grow. They attach themselves to rocks, trees, shrubs, or the ground with their roots used primarily as anchors.
- Trichomes: Their leaves are covered with specialized cells known as trichomes, which are responsible for absorbing water and nutrients directly from the air.
- Photosynthesis: Tillandsia species are capable of a type of photosynthesis called CAM (Crassulacean Acid Metabolism), which allows them to take in carbon dioxide at night, reducing water loss in hot environments.
Diversity of Tillandsia
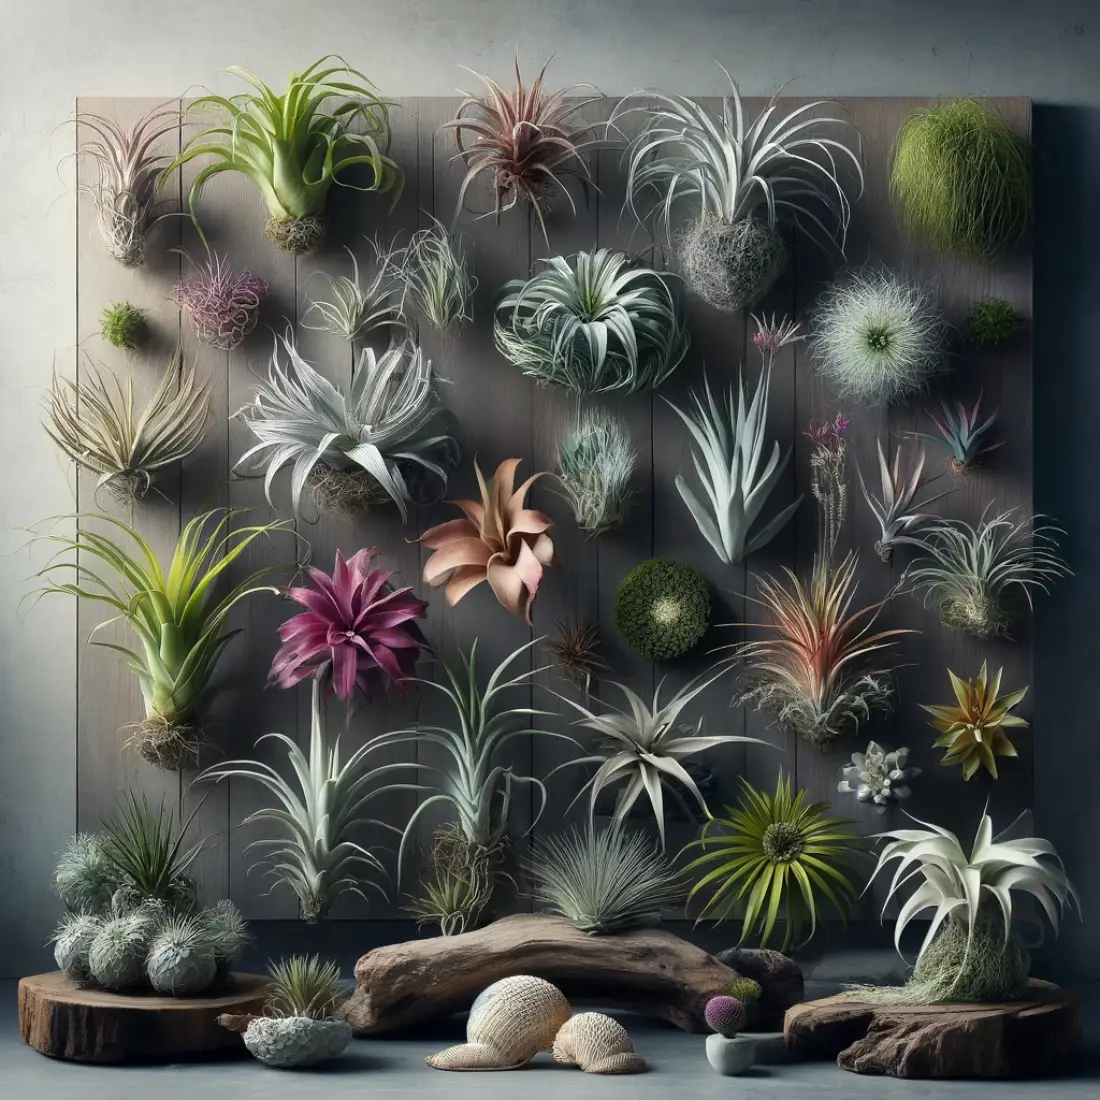
- Variety of Species: There are over 650 species of Tillandsia, ranging from the tiny Tillandsia ionantha to the larger Tillandsia xerographica.
- Shapes and Sizes: Their appearance can vary widely; some have thin, wiry leaves, while others boast broad, flat leaves. The colors can range from deep greens to silvery greys, and some species change color when about to bloom.
- Flowering: Most air plants flower once in their lifetime, producing vibrant and exotic flowers that can last from several days to many months, depending on the species.
Popularity and Uses
- Decorative Versatility: Their soil-free requirement allows them to be placed in a variety of settings such as mounted on pieces of wood, nestled in shells, or suspended in the air, making them versatile elements in interior decoration.
- Ease of Care: Their minimal root system and low maintenance requirements make them particularly appealing for indoor environments and busy plant owners.
Optimal Growing Conditions
To thrive, Tillandsia, or air plants, require specific conditions that mimic their natural habitat as closely as possible.
Light Requirements
- Brightness: Air plants prefer bright, indirect light. Direct sunlight can be too harsh, especially for those with thinner or less silvery leaves. However, species with thicker and more silvery leaves can tolerate more direct light.
- Indoor Placement: Ideal indoor locations include within five to ten feet of a sunny window, or under artificial lighting such as fluorescent or LED grow lights. East- or west-facing windows are typically ideal.
- Outdoor Adaptation: In temperate climates, Tillandsia can be kept outdoors in shaded areas where they are protected from the midday sun. They benefit from the breezes and natural humidity outdoors.
Temperature and Humidity
- Temperature Range: Most air plants thrive in temperatures between 50-90°F (10-32°C). They can tolerate higher temperatures if the humidity is also high, but they are sensitive to frost and should be protected from freezing temperatures.
- Humidity Levels: Tillandsia prefers humidity levels of 50-70%. In dry environments, increased watering or misting can help maintain adequate humidity.
- Air Circulation: Good air circulation is crucial for preventing rot and promoting healthy growth. Ensure that air can flow freely around the plants, especially if they are in enclosed spaces or grouped closely together.
Growing Medium and Placement
- Soilless Growth: Since air plants do not grow in soil, they are typically mounted on a variety of substrates such as wood, rocks, shells, or even hung in the air with wire or string.
- Mounting Considerations: When mounting air plants, it’s important to use materials that do not retain water, such as cedar, driftwood, or cork. Avoid materials that can rot or degrade, as these can harm the plant.
Watering Needs
- Watering Techniques: Depending on the humidity of your environment, watering by soaking or misting is recommended. Soaking the plants in water for 20-30 minutes weekly is usually sufficient, but more frequent misting may be necessary in dry or hot conditions.
- Drying After Watering: After watering, air plants should be given enough time to dry completely within a few hours. This is critical to prevent rot, particularly in the base of the plant.
Creating an environment that aligns with these guidelines will help ensure your Tillandsia not only survive but flourish, bringing a unique and exotic element to your home or garden.
Proper Planting and Mounting
Proper planting and mounting are crucial for the health and aesthetic presentation of Tillandsia (air plants). Since they don’t grow in soil, these plants offer versatile and creative display options. Here’s how you can successfully plant and mount them:
Choosing a Growing Medium
- Soil-Free Requirements: Tillandsia absorbs nutrients and moisture through their leaves, not roots, so soil is unnecessary and can even cause harm by retaining moisture around the base, leading to rot.
- Suitable Mounting Materials: Common materials for mounting include wood (like driftwood or cork), rocks, shells, or ceramic. It’s important to choose non-toxic, water-resistant materials that won’t degrade or trap moisture.
Mounting Techniques
Selecting the Right Spot: Choose a location on the mounting material where the plant will have good air circulation and access to light. Avoid deep recesses or overly sheltered spots where water might collect.
Securing the Plant:
- Gluing: Safe, water-resistant glues like hot glue (at a cool setting) or silicone adhesive can be used. Apply a small amount of glue to the base of the plant, not touching the leaves, and press gently onto the substrate. Hold until the glue sets.
- Wiring: Using a flexible, rust-resistant wire like copper or stainless steel, gently loop the wire around the base of the plant and twist to secure. Attach the other end of the wire to the mounting surface without constricting the plant tightly.
- Tying: Natural twine or fishing line can also be used to tie the plant in place. This method is suitable for temporary displays or when you prefer not to use glue.
Considerations for Mounted Plants:
- Watering: Mounted plants should be easy to remove if they need soaking, or positioned in a way that they can be watered effectively in place. Ensure they can dry properly post-watering.
- Growth and Adjustment: As the plant grows, it may need repositioning or additional securing. Be prepared to make adjustments as needed.
Display Ideas and Creative Mounting Options
- Vertical Gardens: Mount air plants on a wall piece made of wood or mesh to create a living art display.
- Hanging Displays: Suspend air plants using wire holders or string to create floating garden effects. Glass terrariums can also be used for a more enclosed display, but ensure there is plenty of air flow.
- Decorative Groupings: Arrange multiple air plants on a single piece of driftwood or a large shell to create a thematic centerpiece. Different species can be combined for varied textures and colors.
Through these techniques, you can effectively display your Tillandsia in a way that not only ensures their health and growth but also enhances the aesthetic appeal of your space.

Fertilizing Air Plants
Feeding Tillandsia, or air plants, with organic nutrients can support their health and promote robust growth and blooming. Since air plants don’t grow in soil and absorb their nutrients primarily through their leaves, the method and type of fertilizer you choose can significantly impact their wellbeing.
- Nutrient Absorption: Air plants derive their nutrients from the environment, which may not always provide all the necessary elements for optimal growth, especially indoors.
- Boosting Growth: Regular feeding can help compensate for less-than-ideal growing conditions, encouraging stronger, healthier growth and more vibrant blooms.
Types of Organic Fertilizers for Air Plants
- Fish Emulsion: A diluted fish emulsion is an excellent organic option that provides a balanced amount of nutrients. It is gentle and effective but should be used sparingly to avoid buildup on the leaves.
- Seaweed Extract: Seaweed-based fertilizers are rich in trace minerals and growth hormones, which can help stimulate growth and improve the plant’s resilience to stress.
- Worm Tea: This is a mild, nutrient-rich solution made from worm castings. It’s beneficial for air plants due to its gentle nutrient profile and microbial benefits.
How to Apply Fertilizer
Dilution Is Key: Always dilute your organic fertilizer to a quarter of its recommended strength for typical houseplants. Air plants are sensitive to nutrient burn, particularly from concentrated fertilizers.
Method of Application:
Misting: Mix the diluted fertilizer in a spray bottle and lightly mist the plants. This method is ideal for frequent, light feeding, especially during the growing season.
Soaking: Alternatively, you can add diluted fertilizer to water during your regular soaking routine. This can be done once a month or according to the growth needs of the plants.
How to Add Organic Fertilizer to Potted Plants
Best Practices for Fertilizing Air Plants
- Frequency: Monthly feeding is usually sufficient. During the spring and summer, when plants are in their active growth phase, you might increase this to twice a month if the plants appear to be thriving with the extra nutrients.
- Watch for Overfeeding: Signs of overfeeding include burned or dried tips on the leaves. If you notice these symptoms, reduce the frequency or concentration of fertilizer.
- Post-Feed Care: Ensure that plants are allowed to dry thoroughly after feeding to prevent rot and fungal infections.
Organic feeding, when done correctly, can be highly beneficial for the growth and health of air plants, helping them to flourish and bloom. It’s an integral part of the care routine, especially for those looking to nurture their Tillandsia in the most natural way possible.
Importance of Pruning and Grooming
- Health: Removing dead or decaying leaves helps prevent fungal and bacterial infections that can spread to healthy parts of the plant.
- Aesthetics: Trimming off unsightly or damaged leaves keeps your air plant looking its best, making it a more attractive part of your home decor.
- Growth: Pruning can stimulate new growth and potentially aid in the plant’s flowering process by redirecting energy from old or damaged parts to healthier, growing parts.
Tools and Preparation
- Sharp Scissors: Use a pair of sharp, clean scissors or small pruning shears. Clean the blades with rubbing alcohol before use to prevent the spread of disease.
- Handling: Gently hold your air plant by its base or by the sturdiest part of its leaves. Avoid pulling or tugging at the leaves during grooming.
Pruning Steps
Identify Damaged Leaves: Look for leaves that are brown, yellowing, or crispy. These are typically older leaves that the plant is naturally shedding.
Trimming Dead or Damaged Leaves: Carefully cut the unwanted leaves close to the base, but be careful not to cut into the healthy tissue. Make a clean cut that follows the natural shape of the leaf to maintain the plant’s appearance.
Shaping the Plant: If desired, you can also trim healthy leaves to shape the plant. This is purely aesthetic and should be done sparingly to avoid stressing the plant.
Post-Pruning Care
- Allow to Dry: After pruning, if the plant was wet during the process, make sure it is allowed to dry thoroughly in a bright, airy spot. This helps prevent any water from causing rot where the cuts were made.
- Monitor the Plant: Keep an eye on the plant after pruning to ensure it continues to thrive. Any signs of distress could indicate too much pruning or possible infection at the cut sites.
Propagation of Tillandsia
Propagation of Tillandsia, or air plants, is a rewarding process that can help you expand your collection and share these unique plants with friends and family. Air plants primarily propagate through the production of offsets, commonly known as “pups.” These pups are natural clones of the parent plant and usually start to form after the plant has flowered. Here’s how to propagate Tillandsia effectively:
- Life Cycle: Most Tillandsia will flower once in their lifetime. After blooming, the plant puts its energy into producing pups.
- Pup Formation: Pups usually form at the base of the plant and can be observed growing out from between the mother plant’s leaves.
Tools and Preparation
- Sharp Scissors or Knife: Ensure your tool is clean and sharp to make a clean cut, which helps prevent damage and potential disease.
- Sanitizing Solution: Clean your cutting tool with rubbing alcohol before and after use to prevent infection.
Steps for Propagating Air Plants
Wait for Pups to Mature: It’s crucial to allow the pups to reach at least one-third the size of the parent plant before separation. This ensures they are sufficiently developed to survive on their own.
Separating the Pup:
- Locate the Base: Gently pull back the leaves of the parent plant to expose the base where the pups are attached.
- Cut or Twist Off: Using your clean scissors or knife, carefully cut the pup away from the mother plant. Alternatively, you can gently twist the pup until it comes off. Be careful not to damage the base of either the pup or the parent.
- Planting the Pup: No soil is needed. You can mount the pup just as you would a mature air plant, using glue, wire, or simply placing it in a supportive decorative setting where it can get adequate light and air circulation.
Aftercare for New Plants
- Watering: Begin regular watering immediately after planting. Depending on your environment, misting or soaking the pups as you would adult plants is essential.
- Light and Air: Provide bright, indirect light and ensure there is good air circulation around the new plants to promote healthy growth.
Tips for Successful Propagation
- Patience is Key: Propagation takes time. It may take several months to a year for a pup to mature into a full-sized plant.
- Regular Monitoring: Keep an eye on the health of both the mother plant and the pups. This will help you catch any issues early, such as rot or dehydration.
- Environmental Conditions: As with mature plants, ensure that the pups are kept in optimal conditions regarding light, temperature, and humidity.
Propagation not only extends the life cycle of your Tillandsia collection but also enhances your experience as a gardener, giving you firsthand insight into the fascinating life cycle of these unique air plants.
Troubleshooting Common Problems
Tillandsia, or air plants, while generally easy to care for, can sometimes encounter issues related to pests and diseases. Recognizing the signs of these problems and knowing how to manage them is crucial to maintaining healthy plants.
Common Pests
Mealybugs: Small, white, cottony masses typically found in leaf axils and at the base of the plant.
Treatment: Remove mealybugs using a cotton swab dipped in rubbing alcohol. For more severe infestations, rinse the plant under a strong stream of water and apply an appropriate insecticide or neem oil, keeping in mind to let the plant dry thoroughly afterward.
Natural Methods to Control Mealybug Infestations
Scale: Brown or tan bumps on leaves that can be scraped off. They suck the sap from the plant, weakening it over time.
Treatment: Manually remove scale with a soft brush or cloth soaked in soapy water or rubbing alcohol. Insecticidal soaps or oils like neem oil can also be effective after physical removal.
How to Spot, Treat, and Prevent Scale Insects Naturally
Aphids: Small, soft-bodied insects clustering on new growth and the undersides of leaves.
Treatment: Wash the plant with a strong jet of water to knock aphids off. Apply soapy water or an appropriate organic insecticide if infestation persists.
Effective Methods to Deal with Aphids
Common Diseases
Rot (Fungal and Bacterial): Black, mushy areas on the plant, often starting at the base or in the center of the rosette where water collects.
Treatment: Remove any affected areas with a clean, sharp knife. Allow the cut areas to dry and callus over before returning the plant to its normal environment. Improve air circulation and ensure the plant dries completely between waterings.
Leaf Spot: Brown, black, or red spots on the leaves, sometimes surrounded by a yellow halo.
Treatment: Remove the affected leaves if possible and reduce overhead watering to prevent water from sitting on the leaves for prolonged periods. Fungicidal sprays may be necessary for severe cases.
Preventive Measures
- Proper Air Circulation: Ensure that your air plants have plenty of airflows to quickly dry them after watering.
- Correct Watering: Avoid overwatering and ensure that water does not sit in the crown of the plant for extended periods. Water in the morning so the plant has time to dry throughout the day.
- Regular Inspection: Regularly check your air plants for signs of pests or disease. Early detection is key to effective treatment.
- Quarantine New Plants: When introducing new plants to your collection, keep them separate from your existing plants for a few weeks to monitor for any issues.
By following these troubleshooting tips and maintaining proper care practices, you can help ensure your Tillandsia stays healthy and vibrant. Regular monitoring and prompt action at the first sign of trouble are vital to managing these common problems effectively.
FAQs about Tillandsia
What is the best way to water my Tillandsia?
Air plants should be watered by soaking them in water for 20-30 minutes once a week. Ensure they are turned upside down after soaking to allow excess water to drain from the base and leaves to prevent rot.
How much light do air plants need?
Tillandsia thrives in bright, indirect sunlight. They can also grow under fluorescent lighting, making them ideal for offices or rooms without natural light.
Can I grow an air plant in soil?
No, air plants should not be planted in soil because their roots are used primarily for anchoring, not for nutrient absorption. They absorb all their nutrients through their leaves.
What temperatures are best for air plants?
Air plants prefer temperatures between 50-90°F (10-32°C). They can tolerate higher temperatures if the humidity is sufficient, but they should be protected from frost.
How do I know if my air plant is healthy?
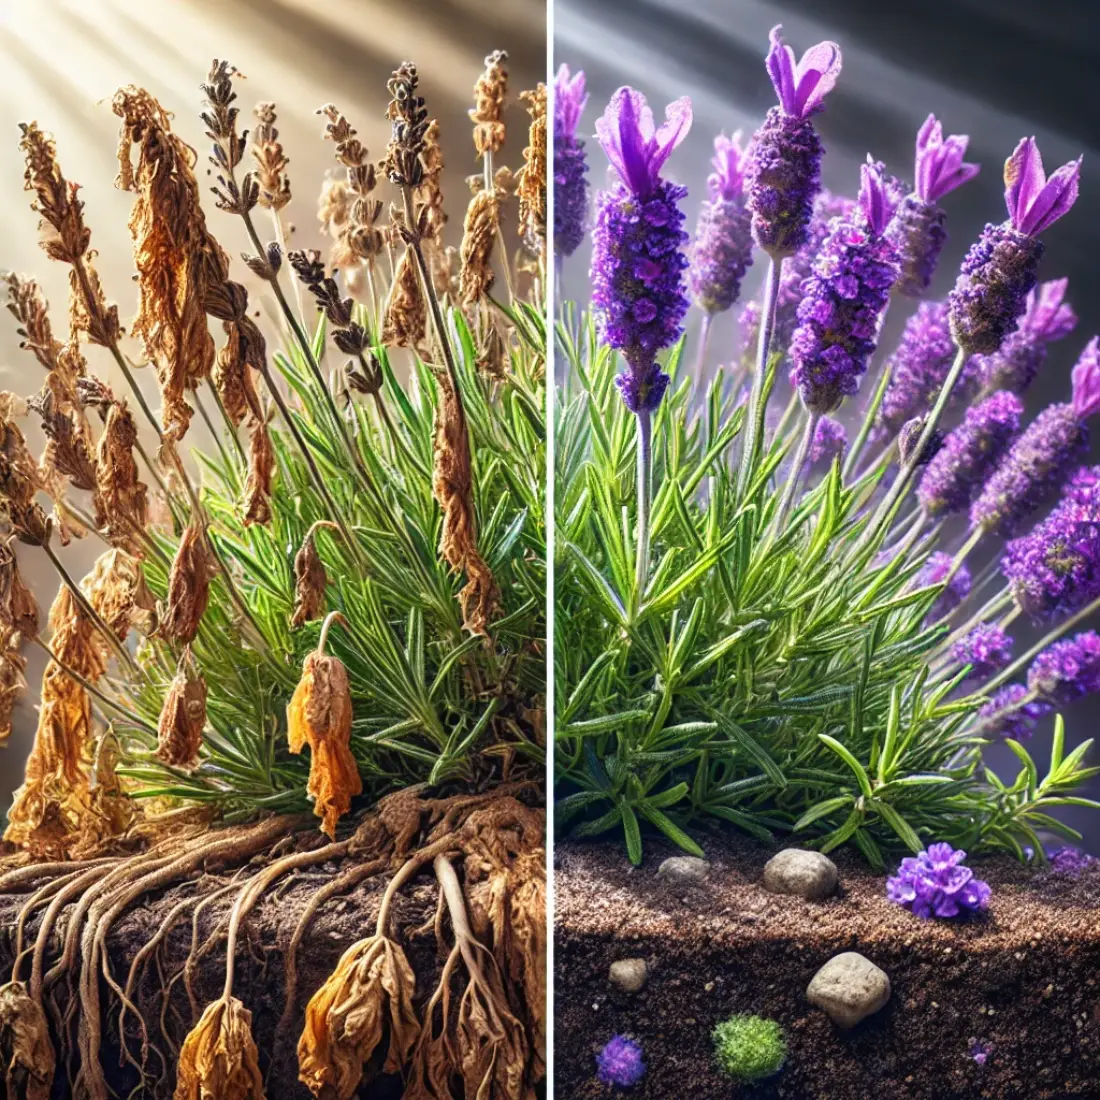
A healthy air plant will have firm, supple leaves. If the leaves start to curl excessively, become soft or discolored, or if the base of the plant feels mushy, these could be signs of distress.
How often should I fertilize my air plant?
Fertilizing once a month during the growing season with a bromeliad or orchid fertilizer diluted to 1/4 strength can help promote growth and flowering.
What do I do if my air plant starts to rot?
If rotting occurs, usually indicated by a black or mushy base, remove the affected areas immediately with a clean, sharp tool. Improve air circulation around the plant, and ensure it dries thoroughly after watering.
Can air plants live in low humidity environments?
Air plants can adapt to low humidity environments, but they will require more frequent misting or soaking to compensate for the lack of moisture in the air.
How do I propagate air plants?
Air plants can be propagated by separating pups, or offsets, from the mother plant once they are about one-third her size. This usually occurs after the mother plant has flowered.
What are common pests that affect air plants, and how do I deal with them?
Common pests include mealybugs, aphids, and scale. These can be treated by washing the plants with a strong water jet or applying insecticidal soap or neem oil.